
")
For Easter this year, consider naturally dyed Easter eggs. While you don’t actually eat the dye on Easter eggs (as you might with other dyed foods) since you’re only coloring the shell, there are still very important reasons to use natural dye. First, eggs often get a little cracked during the process of dying (especially when children are helping), and dye seeps into the egg white – that would end up being ingested. Also, children dying eggs will get artificial dye on their fingers, it absorbs into their skin and can cause a reaction. Further, by going natural and making your dyes at home, you are not supporting companies in the “artificial food” business. And, it’s a really fun science experiment to take ingredients from your kitchen and make them into natural dyes.
Let’s get started.
You boil your eggs and cool them first, then separately prepare your dye and color them.
First, hard boil eggs
Be careful to not overcook them. When they’re overcooked they take on a characteristic green yolk and sulfur smell. There are many ways to make hard boiled eggs; though my favorite technique ensures consistent hard-boiled eggs every time – so the yolk is not green.
Bring a pot of water to a boil, lower the heat slightly for a few moments (so it’s not an aggressive boil) but still very hot and ready to go (too much jostling or heat can cause the eggs to crack). Turn the heat back up and start the timer once you have the eggs in the pot, not once it returns to a boil.
Cook on a low simmer for 10-12 minutes. This is for large or extra large eggs, if you are using medium eggs, decrease the cooking time a minute or two.
I make dozens of hard boiled eggs for traveling to conferences, camping, or to make deviled eggs for parties – so I’ve experimented a lot. Cooking time depends on how you like your eggs cooked, the full range I use is from 8-13 minutes. Sometimes, I like my eggs with a bit of slightly “gooey” yolk in the center – if so, I boil them for about 8 minutes. Anything more than 13 minutes and you will have green yolks. Most people, especially for Easter eggs, prefer 10-12 minutes.
Plunge to Cool
Once your eggs have boiled for the appropriate amount of time, the next crucial step is to plunge them in cold water a few times to cool them quickly. If you leave them sitting in the cooking water, or even hot water that was changed out only once, your eggs will keep cooking and may turn green.
Dying Eggs
The process is fairly similar for all colors. You will combine water, the dying medium, and some vinegar and simmer until complete. Then add eggs to dye. Below are some recipes for colors and more thorough instructions.
Pink/Magenta Color
3 medium beets, grated or chopped small
¼ cup of white vinegar
1 quart of water
Blue
3 cups red cabbage, chopped
¼ cup of white vinegar
1 quart of water
Yellow
3 Tablespoons of ground turmeric powder
¼ cup vinegar
1 quart of water
Simmer dye mixture for 30 minutes. Strain out dying medium and pour liquid into a pot or bowl. Once liquid is cooled to body temperature or room temperature, add already cooked hard-boiled eggs. Soak in dye liquid for anywhere from 30 minutes to several hours or even overnight. I tend to do 1-2 hours depending on the color.
Additionally, you can mix colors like using some cabbage and turmeric liquid for a green color, or coffee for brown eggs.
You can also use naturally brown and green eggs for beautiful colors without the fuss.
To add cute designs, simply take a white crayon and draw anything you want (hearts, stars, squiggly lines, straight lines, etc.) on the boiled and cooled eggs. You can also apply small stickers. Make sure they are dry before drawing or applying stickers. If you use stickers, simply peel off after dyeing. The place where the sticker was will still be egg colored and the dye will cover the rest of the egg.
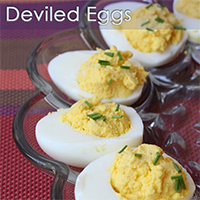
If you have extra leftover Easter eggs, check out my recipe for Deviled Eggs.

Very well presented. Every quote was awesome and thanks for sharing the content. Keep sharing and keep motivating others.
Hi Julie,
This is a great recipe/blog. Thank you so much for posting. I will use it for my 3-yr grandson.
Truly miss getting together with you and Trudy.
Wishing you all the best,
Donna